Create a PayMe link
PayMe is a fully PCI compliant, secure method for taking payments. It allows you to create a link that can be copied into an email or an invoice and sent. It means that you are not taking customer card details, thereby removing yourselves from the risk of compromising customer credit card details.
PayMe works by allowing the card holder to pay using our 3 Party (Server Hosted) Hosted Page. This is available to all customers with an ecommerce facility from their merchant bank.
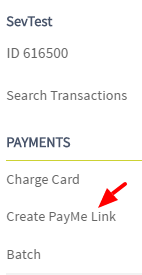
Click on Create PayMe Link to get started.
Create a link in PayMe Administration
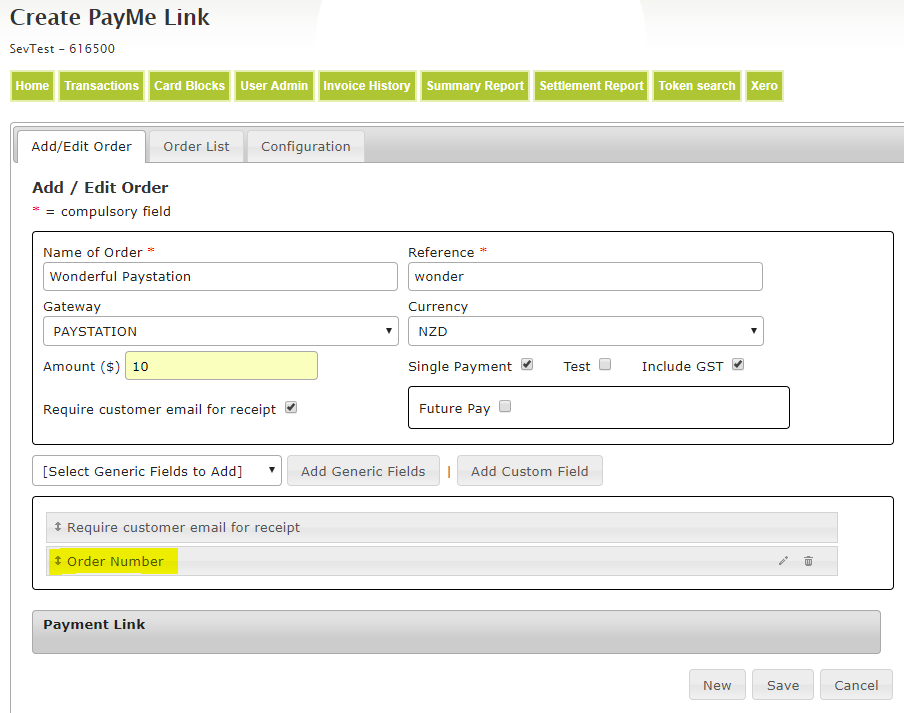
Create a link under Add/Edit Order by filling out the required and optional fields. Enter the name of your order and an order reference as these are compulsory fields.
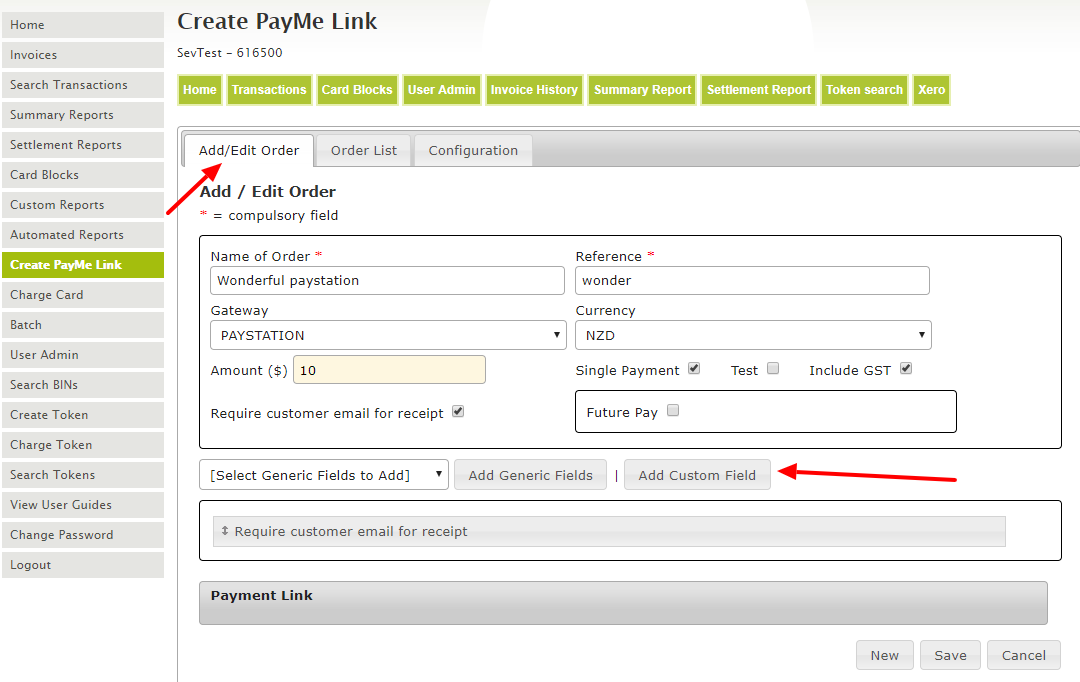
In addition to this you can select the following :
- The Gateway (if you have more than one payment gateway on your account)
- The Currency (if you have more than one currency available)
- The Amount (leave this blank if you want the customer to set how much they are paying)
- Require customer email for receipt (adds the customers email to the PayMe landing page as a compulsory field)
- Single payment (this is by default, untick if you wish to use the link to accept multiple payments)
- Test (for doing a test transaction using our test credit cards)
- Include GST (untick if you wish to charge GST separately)
- Future Pay (selecting this will tokenize the card holders credit card)
In addition, you can add extra fields to the link that will appear on the PayMe landing page. You do this by either adding a Generic Field (address, city) or a Custom Field, or both. Your Custom Field can be whatever you want. Order Number, Invoice Number, Customer Name are just a couple of examples.
Let’s click on Add Custom Field to add an Order Number custom field.
- Type the name of the custom field
- Select the type of field from the dropdown menu (Text Input, Text Area, Select Dropdown, Reference)
- Tick on compulsory if you want to make it a compulsory field
- Select the type of validation field from the dropdown menu (none, Alpha Only, Numeric Only, Alpha-Numeric Only, Valid Email Address )
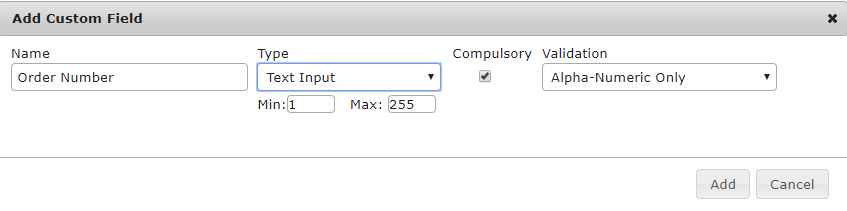
Add will save the new field which will appear at the bottom of the page.
Once you have added all additional generic and custom fields, click Save and a link will be generated at the bottom of the page.
The link can be copied and shared with customers e.g through email.

Once your customer receives the payment link, they will be taken to the PayMe landing page as shown below.
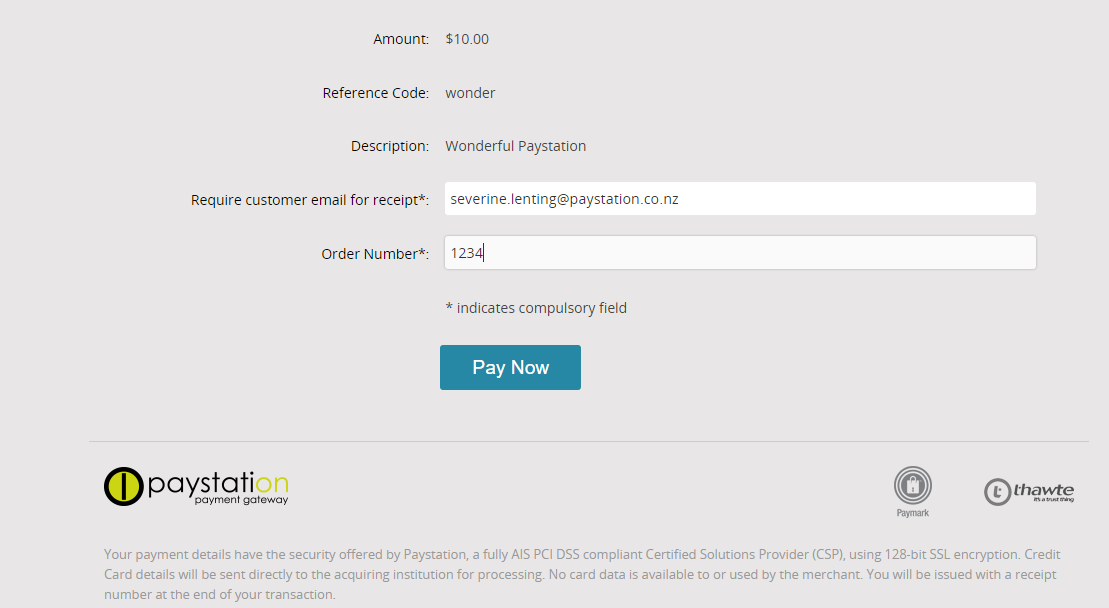
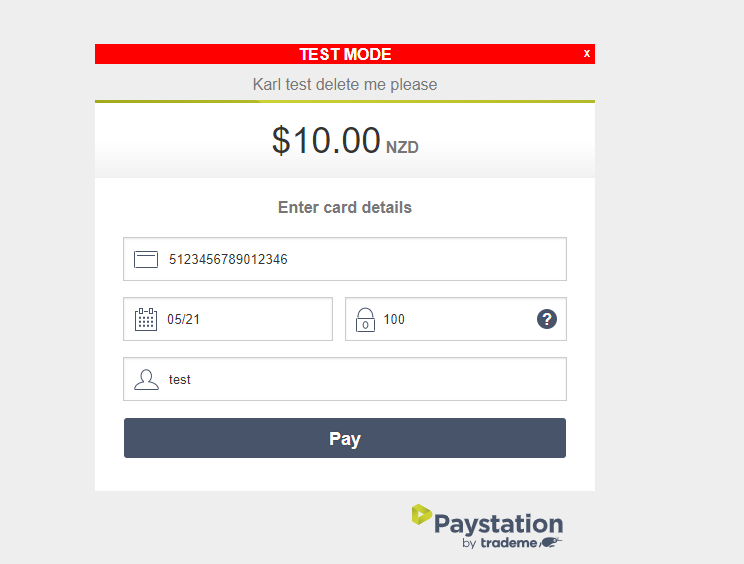
When they click Pay Now, they are taken to the card details screen where they enter their credit card details.
After a successful payment your customer will see their transaction details displayed in their browser.

If you have selected the email as a compulsory field they will be emailed a transaction receipt. You will also receive a notification email, whether the transaction is successful or unsuccessful.
Using the Order List tab
The Order List allows you to search for an order by date range, reference or gateway. You can also filter by whether the order has been paid, unpaid or was a one off payment.
When you find the order you are looking for, you can then do the following:
- Edit the payment link
- Enable the payment link
- Disable the payment link
- View the payment link
- View transaction details for that order


Then click on View Transactions Details. The transaction would now appear in the transaction list of a new transaction search.
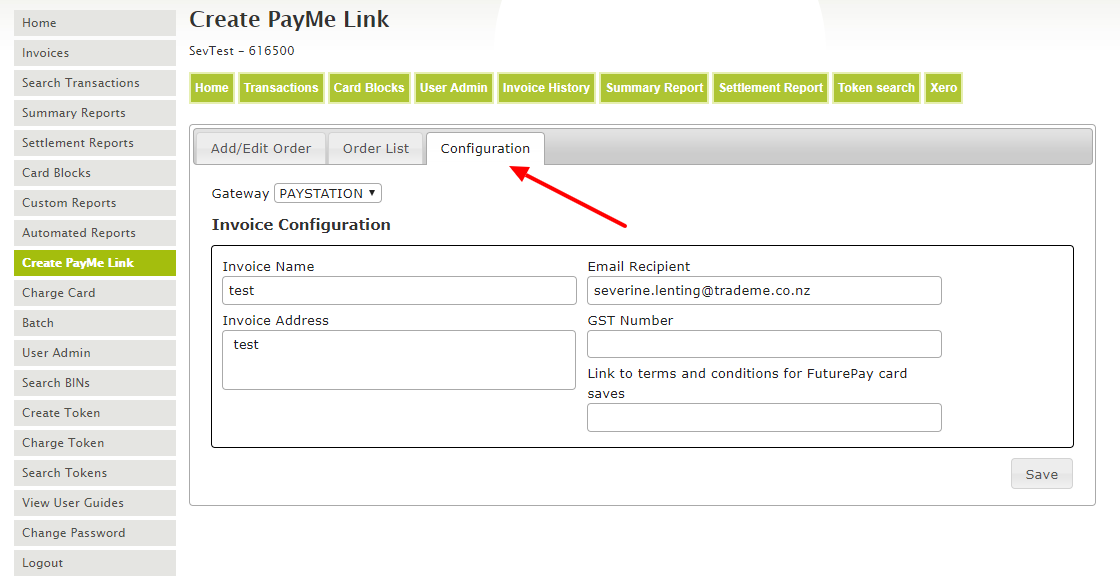
Configuration tab
The Configuration tab allows you to set the Invoice Name (legal or trading name for instance), the Email Recipient (what email address the merchant transaction notification email goes to), the Invoice Address, GST Number and the Link to the terms and conditions for FuturePay card saves (terms and conditions for credit card tokenisation).
To edit, simply change the desired field and Save.